04 - Add Item Screen
The plan for this section: 这一期的计划
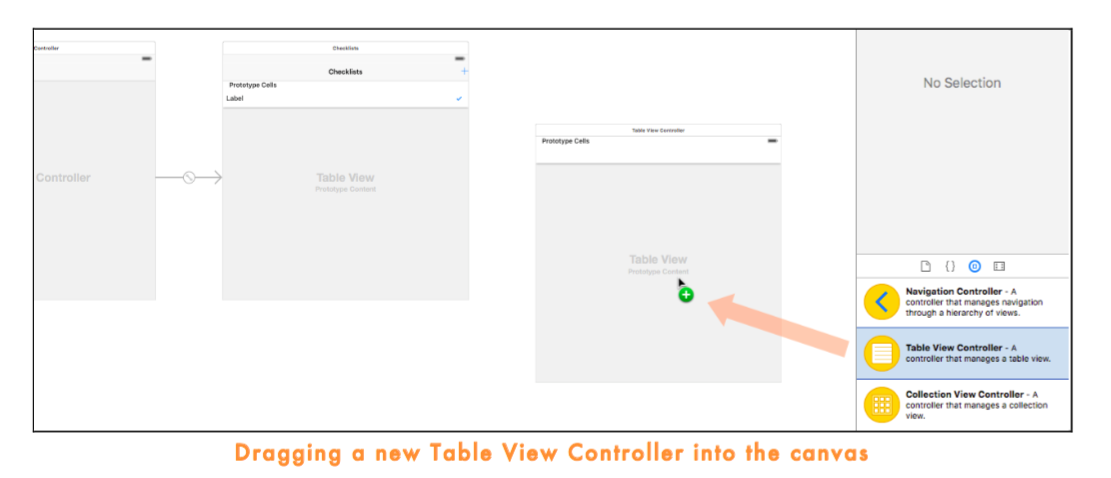
- Create the Add Item screen using the power of storyboarding
- 使用故事板的强大功能创建屏幕添加待办项
- Add a text field and allow the user to type into it using the on-screen keyboard
- 添加一个文本字段,允许用户输入时使用屏幕键盘
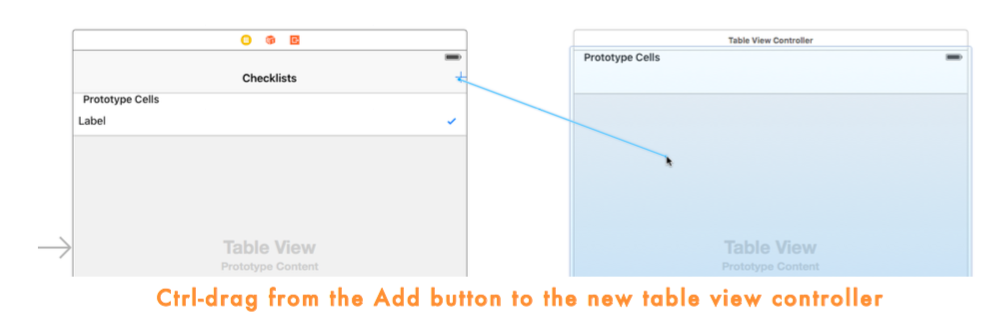
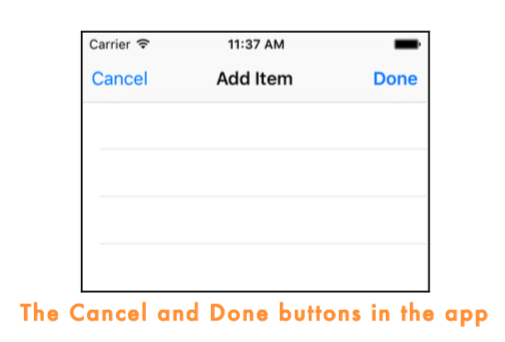
- Recognize when the user presses Cancel or Done on the Add Item screen
- 识别用户按下取消或完成在Add Item屏幕上
- Create a new ChecklistItem with the text from the text field
- 创建一个新的包含文本字段的文本 ChecklistItem
- Add the new ChecklistItem object to the table on the main screen
- 新的 ChecklistItem 对象添加到主屏幕上的 TableView
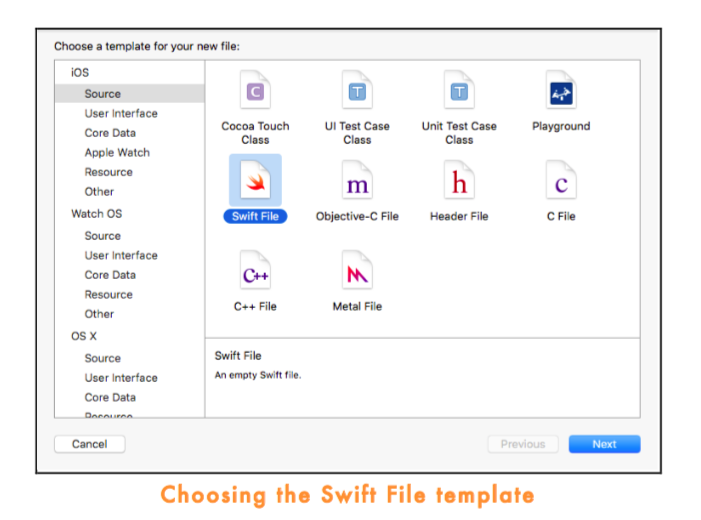
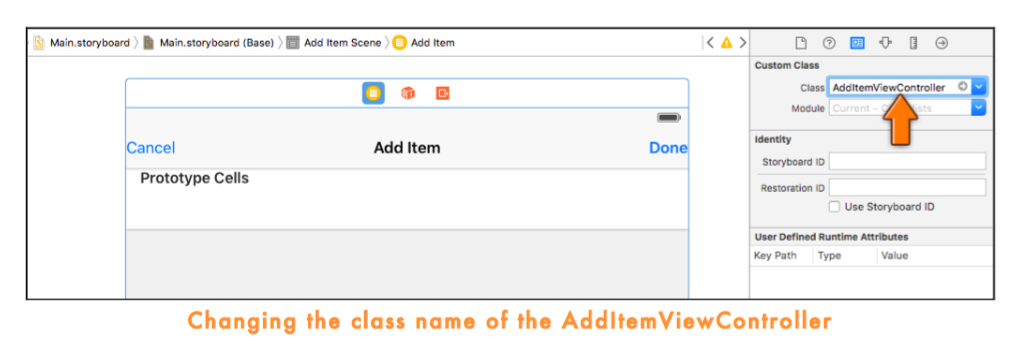
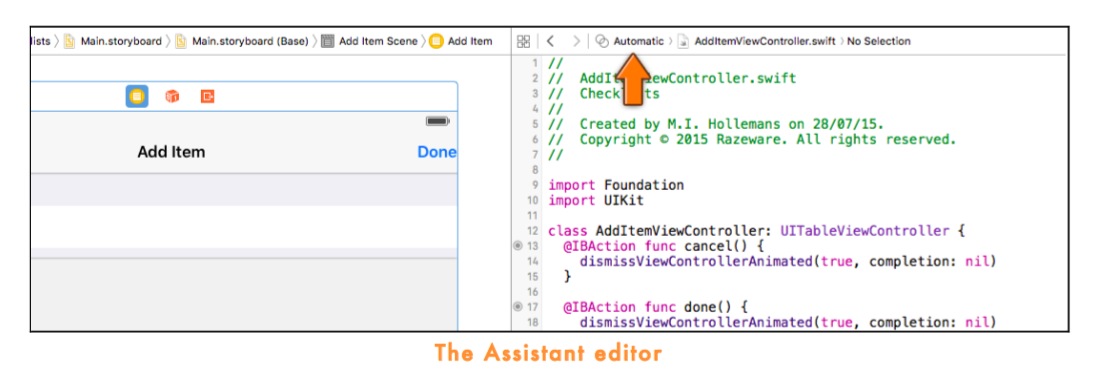
Making your own view controller object 制作自自己的 视图控制器 对象
import UIKit

class AddItemViewController: UITableViewController {

}
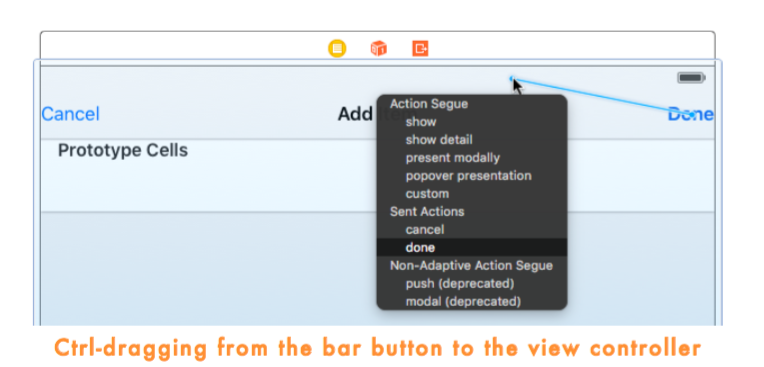
@IBAction func cancel() {
    dismissViewControllerAnimated(true, completion: nil)
}

@IBAction func done() {
    dismissViewControllerAnimated(true, completion: nil)
}
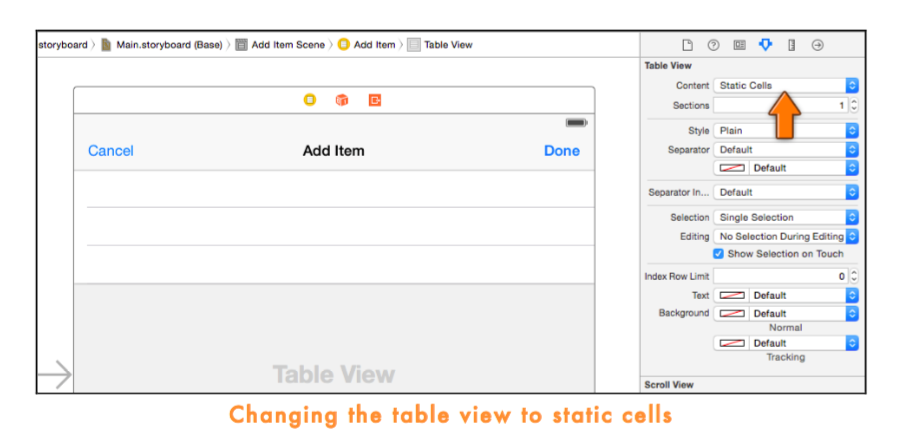
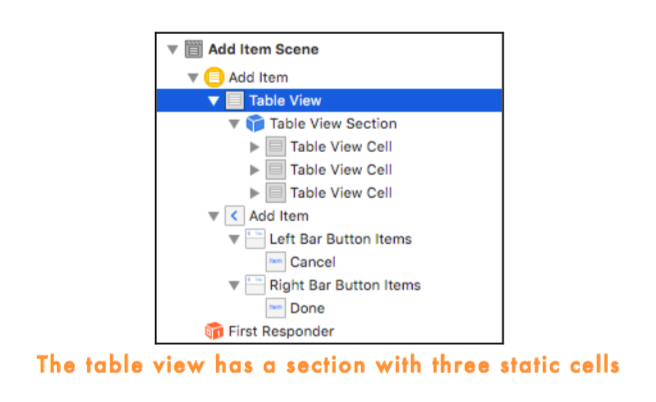
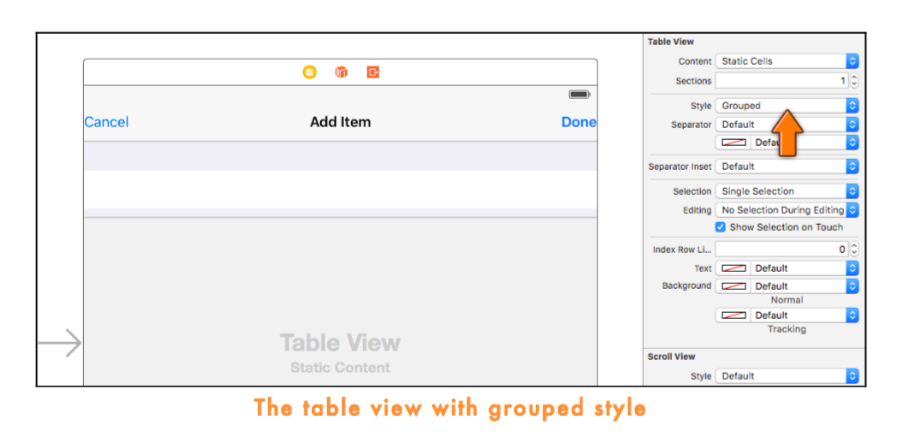
Static table cells
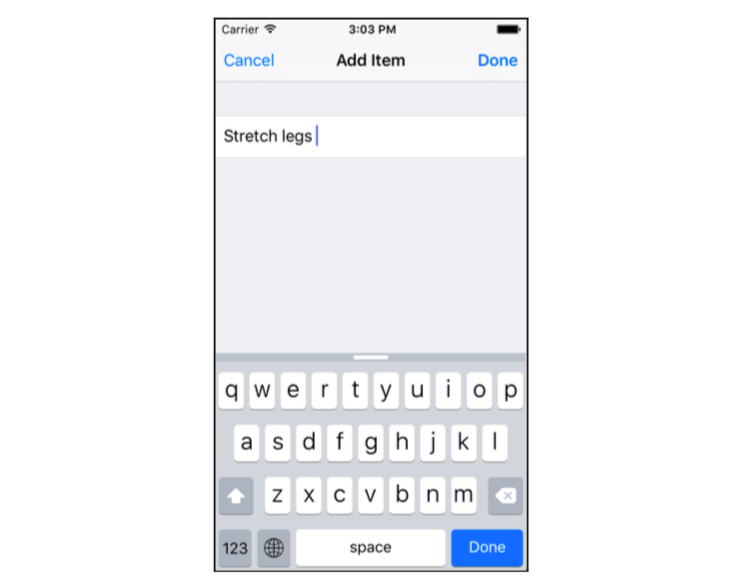

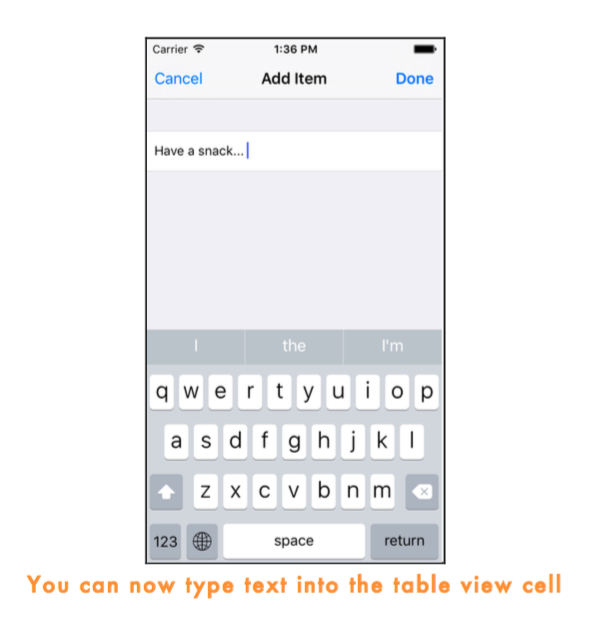
Note: If the keyboard does not appear in the Simulator, press ⌘K or use the Hardware → Keyboard → Toggle Software Keyboard menu option. You can also use your normal Mac keyboard to type into the text field, even if the on-screen keyboard is not visible.
注意:如果在模拟器中没有弹出键盘,可以按住 ⌘K 或者 在菜单栏里面选择 Hardware → Keyboard → Toggle Software Keyboard 选项。你仍然可以在 TextField 里面使用 Mac 键盘,尽管在屏幕上的键盘不可见时。
override func tableView(tableView: UITableView, willSelectRowAtIndexPath indexPath: NSIndexPath) -> NSIndexPath? {
    return nil
}
Return to sender
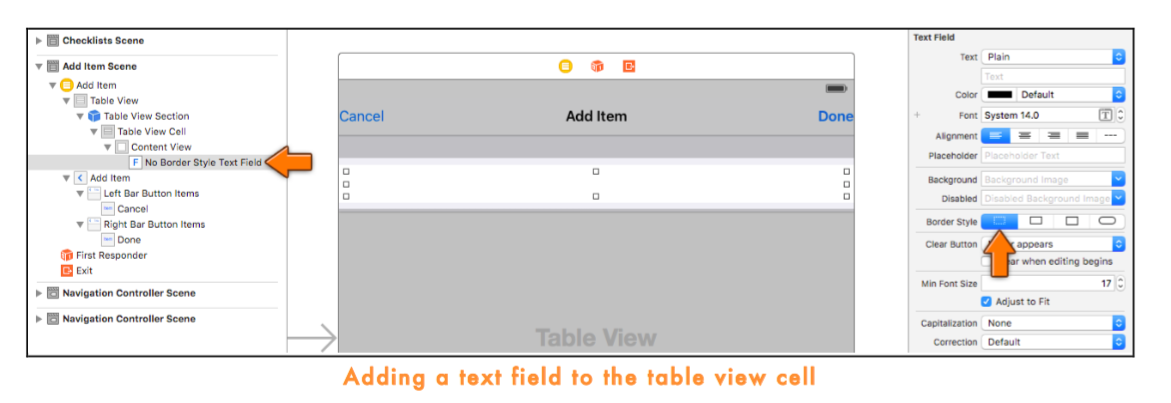
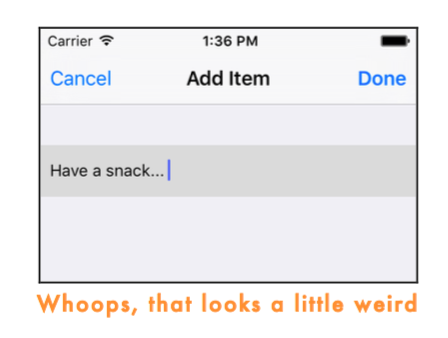
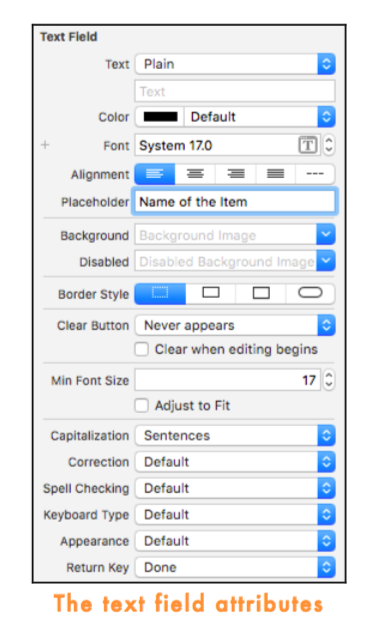
In the storyboard, select the table view cell and go to the Attributes inspector. Set the Selection attribute to None.
在 storyboard 中,选择 TableViewCell 之后打开 属性检查器。设置 选中属性 为 None。
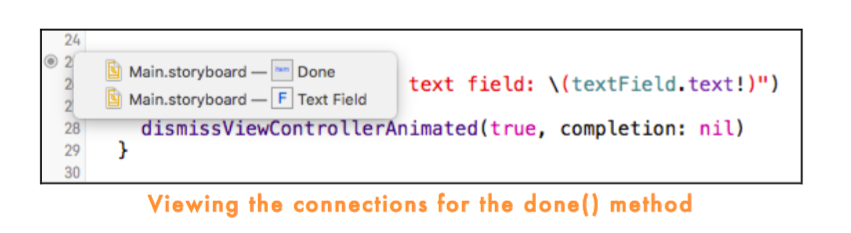
Reading from the text field
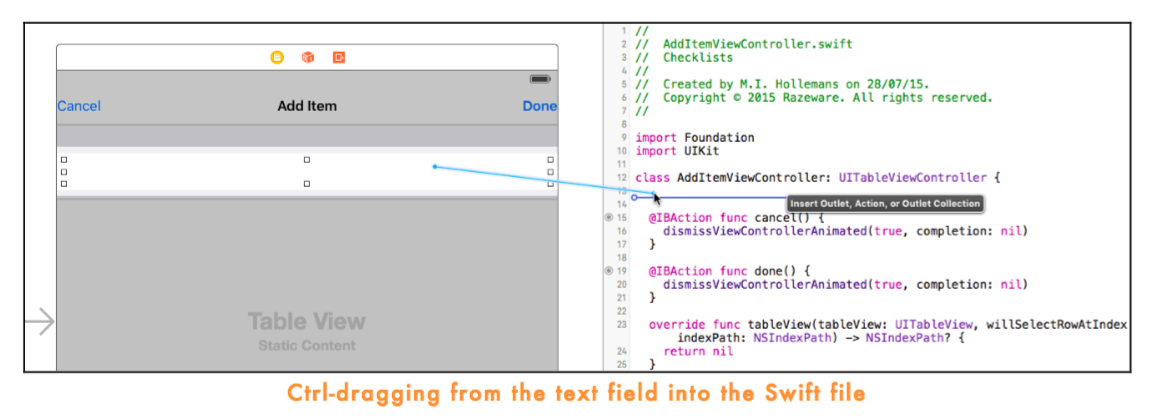

@IBOutlet weak var textField: UITextField!In AddItemViewController.swift, change done() to:
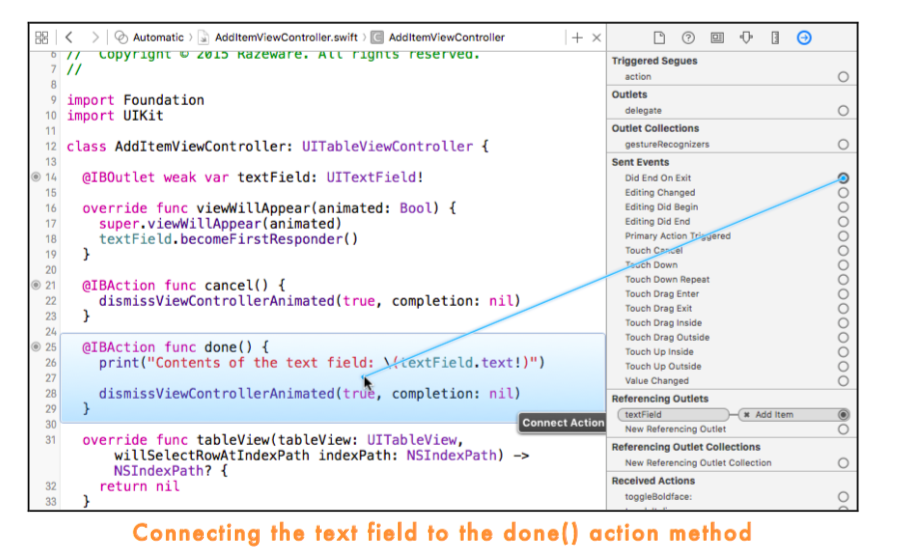
@IBAction func done() {
    print("Contents of the text field: \(textField.text!)")
    dismissViewControllerAnimated(true, completion: nil)
}
Polishing it up 加工润色
To accomplish this, add a new method to AddItemViewController.swift, viewWillAppear():
为了完成这个,需要在 AddItemViewController.swift 中添加 viewWillAppear()
override func viewWillAppear(animated: Bool) {
    super.viewWillAppear(animated)

    textField.becomeFirstResponder()
}
class AddItemViewController: UITableViewController, UITextFieldDelegate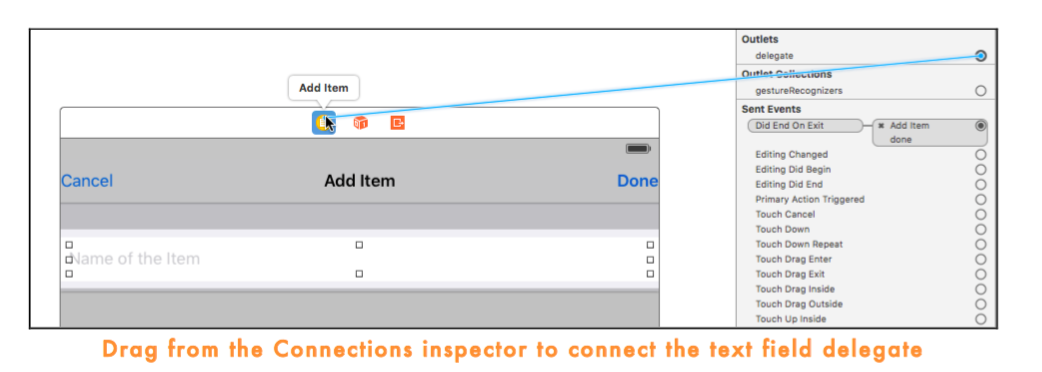
@IBOutlet weak var doneBarButton: UIBarButtonItem!Add the following to AddItemViewController.swift, at the bottom:
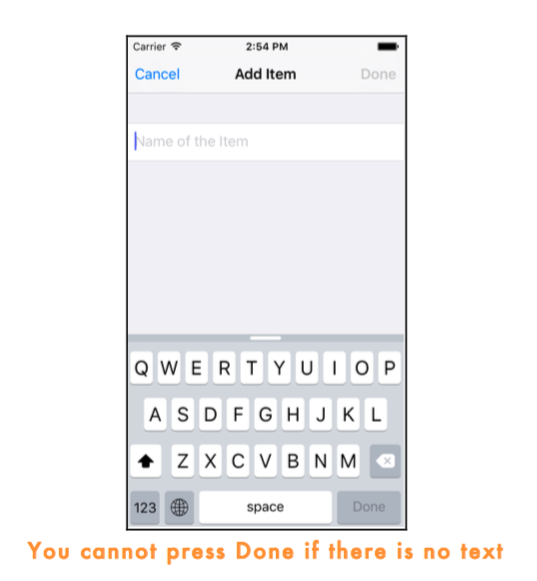
func textField(textField: UITextField,
               shouldChangeCharactersInRange range: NSRange,
               replacementString string: String) -> Bool {
    let oldText: NSString = textField.text!
    let newText: NSString = oldText.stringByReplacingCharactersInRange(range, withString: string)

    if newText.length > 0 {
        doneBarButton.enabled = true
    } else {
        doneBarButton.enabled = false
    }

    return true
}
There is actually a slightly simpler way to write the above method:
func textField(textField: UITextField,
shouldChangeCharactersInRange range: NSRange,
replacementString string: String) -> Bool {
let oldText: NSString = textField.text!
let newText: NSString = oldText.stringByReplacingCharactersInRange(range, withString: string)
doneBarButton.enabled = (newText.length > 0)
return true
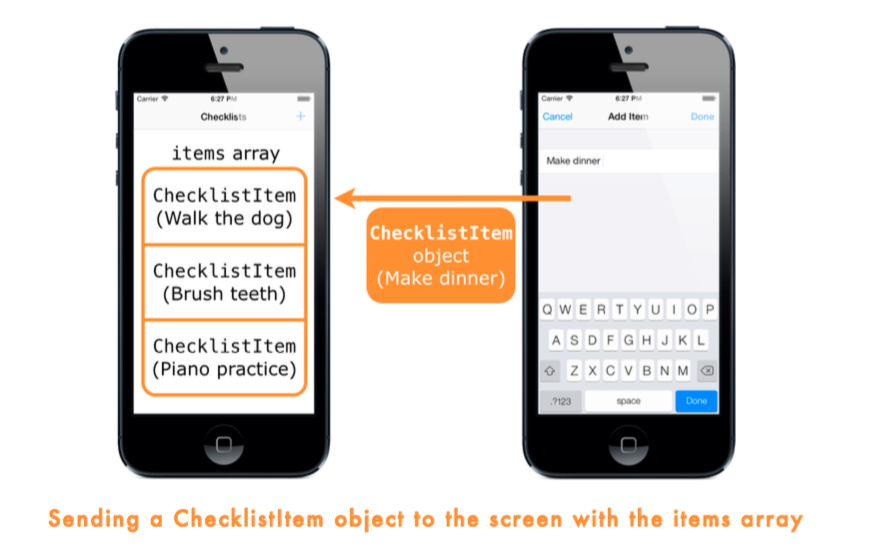
}Adding new ChecklistItems
class AddItemViewController: UITableViewController . . . {
    // This variable refers to the other view controller
    var checklistViewController: ChecklistViewController

    @IBAction func done() {
        // Create the new checklist item object
        let item = ChecklistItem()
        item.text = textField.text!

        // Directly call a method from ChecklistViewController
        checklistViewController.addItem(item)
    }
}
At the top of AddItemViewController.swift, add this in between the import and class lines (it is not part of the AddItemViewController object):
protocol AddItemViewControllerDelegate: class {
    func addItemViewControllerDidCancel(controller: AddItemViewController)
    func addItemViewController(controller: AddItemViewController, didFinishAddingItem item: ChecklistItem)
}
Add this inside the class AddItemViewController, below the outlets:
weak var delegate: AddItemViewControllerDelegate?Replace the cancel() and done() actions with the following:
@IBAction func cancel() {
    delegate?.addItemViewControllerDidCancel(self)
}

@IBAction func done() {
    let item = ChecklistItem()
    item.text = textField.text!
    item.checked = false

    delegate?.addItemViewController(self, didFinishAddingItem: item)
}
In ChecklistViewController.swift, change the class line to the following (this goes all on one line):
class ChecklistViewController: UITableViewController, AddItemViewControllerDelegate {Add the implementations of the protocol’s methods to ChecklistViewController:
func addItemViewControllerDidCancel(controller: AddItemViewController) {
dismissViewControllerAnimated(true, completion: nil)
}
func addItemViewController(controller: AddItemViewController, didFinishAddingItem item: ChecklistItem) {
dismissViewControllerAnimated(true, completion: nil)
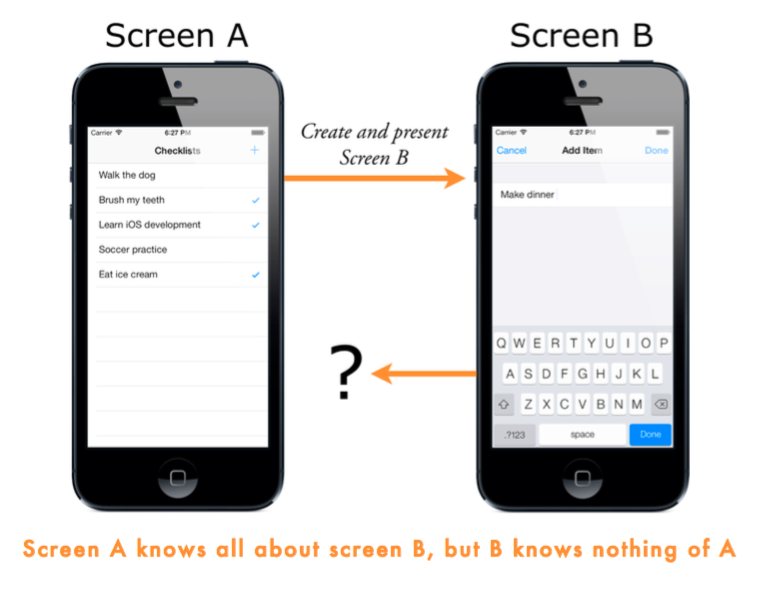
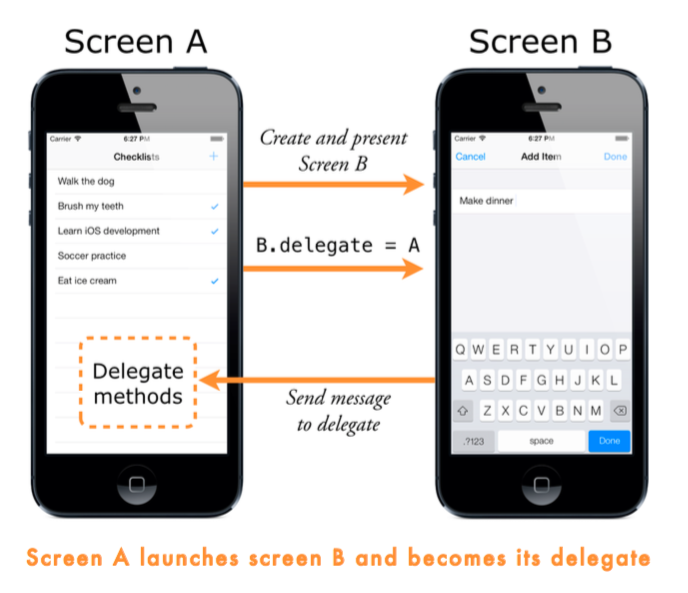
}Delegates in five easy steps
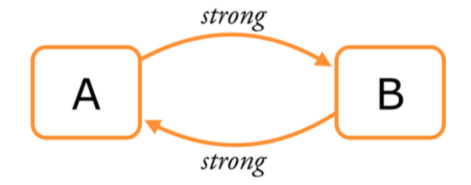
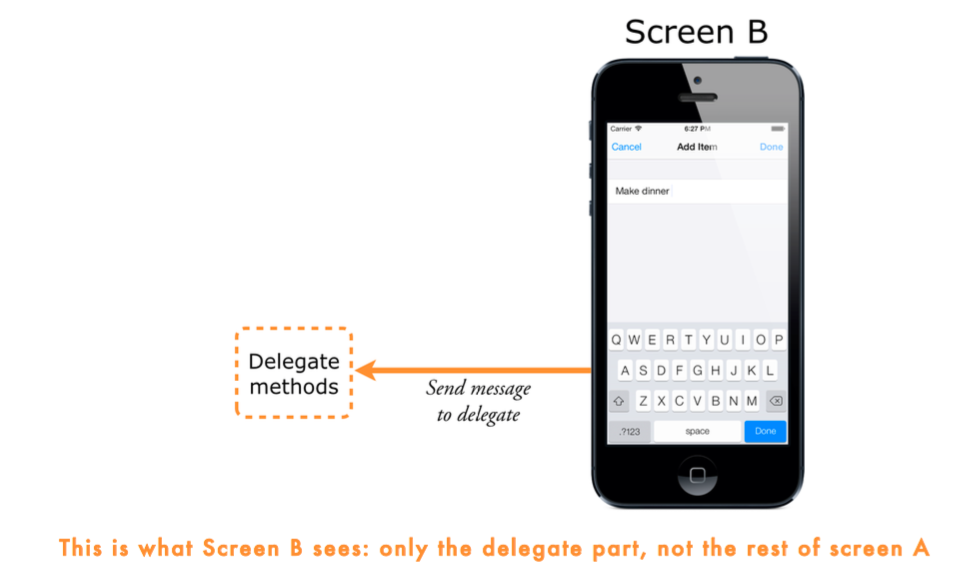
These are the steps for setting up the delegate pattern between two objects, where object A is the delegate for object B, and object B will send messages back to A. The steps are:
- Define a delegate protocol for object B.
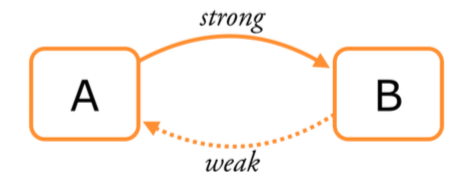
- Give object B an optional delegate variable. This variable should be weak.
- Make object B send messages to its delegate when something interesting happens, such as the user pressing the Cancel or Done buttons, or when it needs a piece of information. You write delegate?.methodName(self, . . .)
- Make object A conform to the delegate protocol. It should put the name of the protocol in its class line and implement the methods from the protocol.
- Tell object B that object A is now its delegate.
Add this method to ChecklistViewController.swift:
override func prepareForSegue(segue: UIStoryboardSegue, sender: AnyObject?) {
    // 1
    if segue.identifier == "AddItem" {
        // 2
        let navigationController = segue.destinationViewController as! UINavigationController

        // 3
        let controller = navigationController.topViewController as! AddItemViewController

        // 4
        controller.delegate = self
    }
}
This is what prepareForSegue does, step-by-step:
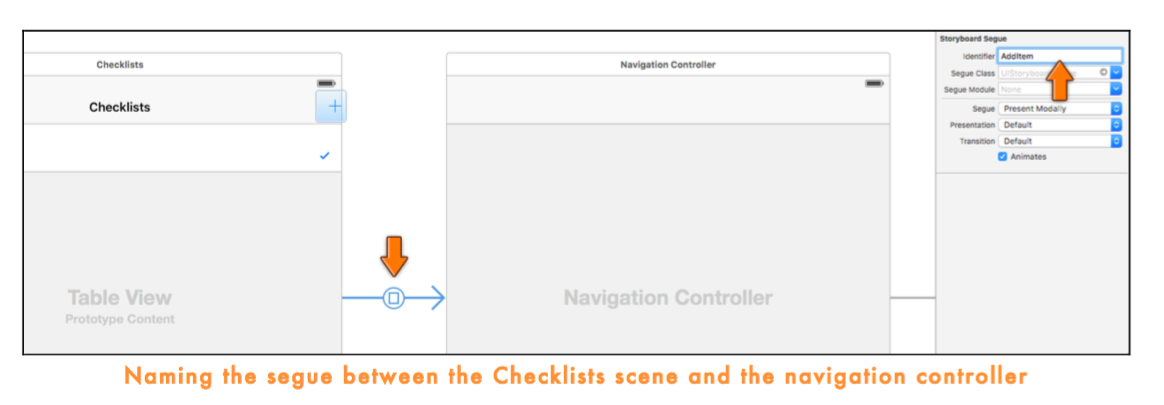
- Because there may be more than one segue per view controller, it’s a good idea to give each one a unique identifier and to check for that identifier first to make sure you’re handling the correct segue. Swift’s == comparison operator does not work on just numbers but also on strings and most other types of objects.
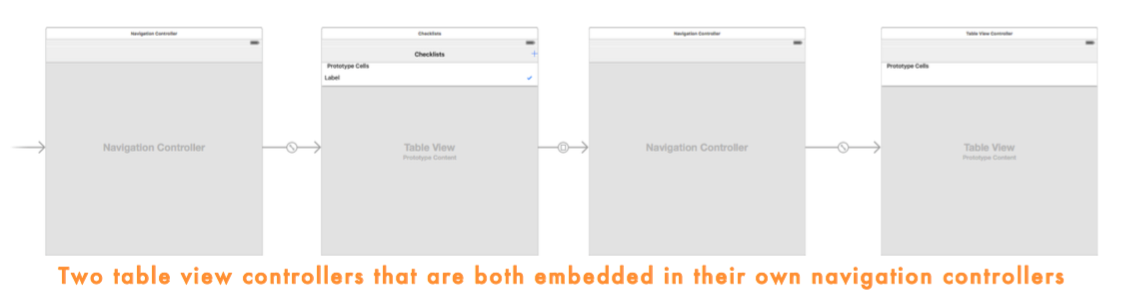
- The new view controller can be found in segue.destinationViewController. The storyboard shows that the segue does not go directly to AddItemViewController but to the navigation controller that embeds it. So first you get ahold of this UINavigationController object.
- To find the AddItemViewController, you can look at the navigation controller’s topViewController property. This property refers to the screen that is currently active inside the navigation controller.
- Once you have a reference to the AddItemViewController object, you set its delegate property to self and the connection is complete. This tells the AddItemViewController that from now on, the object known as self is its delegate.
Change the implementation of the didFinishAddingItem delegate method in ChecklistViewController.swift to the following:
func addItemViewController(controller: AddItemViewController, didFinishAddingItem item: ChecklistItem) {
let newRowIndex = items.count
items.append(item)
let indexPath = NSIndexPath(forRow: newRowIndex, inSection: 0)
let indexPaths = [indexPath]
tableView.insertRowsAtIndexPaths(indexPaths, withRowAnimation: .Automatic)
dismissViewControllerAnimated(true, completion: nil)
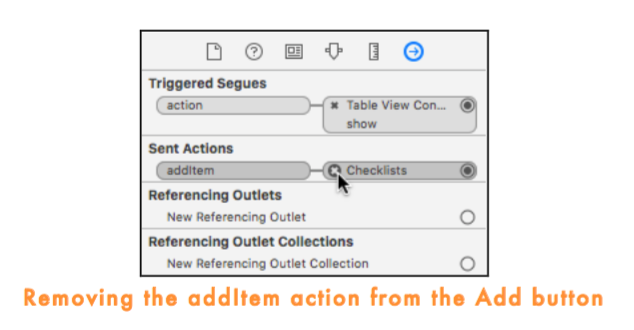
}Remove addItem() from ChecklistViewController.swift as you no longer need this method.

Weak