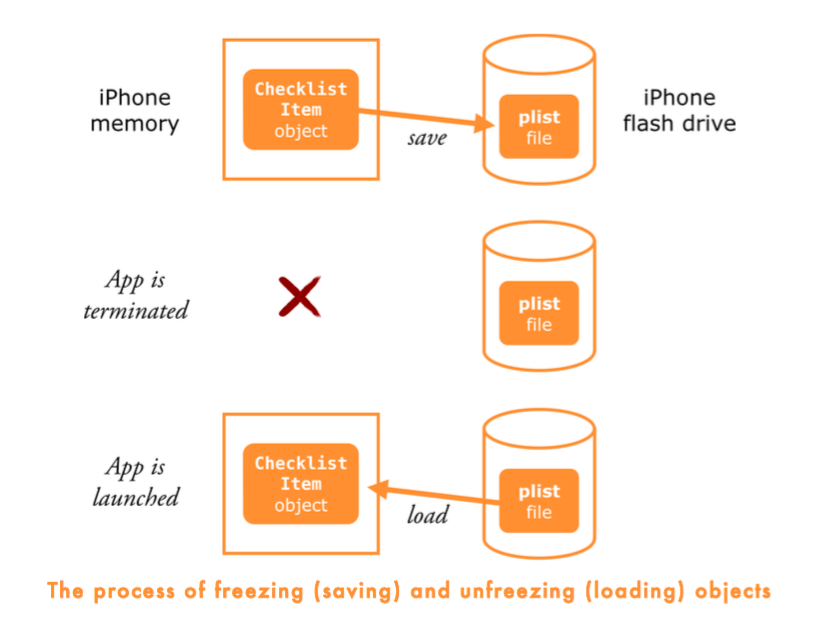
06 - Saving and Loading
Saving and loading the checklist items
In this section you will: 这一期我们将要
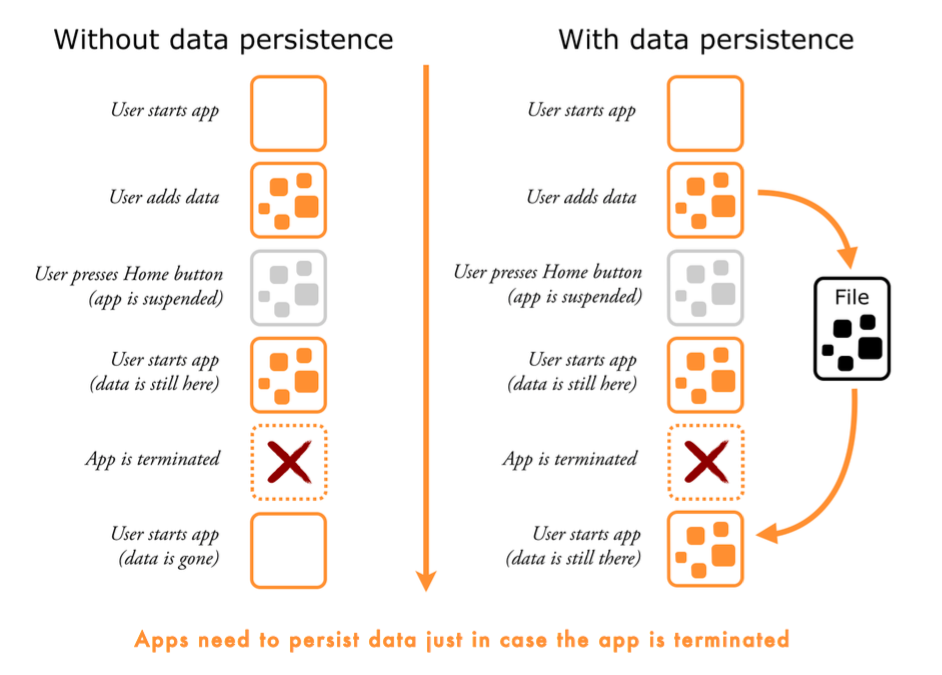
- Determine where in the file system you can place the file that will remember the to-do list items.
- 确定文件在文件系统存放位置将会记得(保存)待办列表事项
- Save the to-do items to that file whenever the user changes something: adds a new item, toggles a checkmark, deletes an item, et cetera.
- 当用户更改:添加一个新条目,切换选择目录,删除一个条目,等等,则将待办事项保存到该文件
- Load the to-do items from that file when the app starts up again after it was terminated.
- 当应用终止后再次启动时,从文件中待办事项
The documents directory
Add the following methods to ChecklistViewController.swift:
func documentsDirectory() -> String {
    let paths = NSSearchPathForDirectoriesInDomains(.DocumentDirectory, .UserDomainMask, true)
    return paths[0]
}

func dataFilePath() -> String {
    return (documentsDirectory() as NSString)
}
Note: Double check to make sure this says .DocumentDirectory and not .DocumentationDirectory. Xcode’s autocomplete can easily trip you up here!
recommended 推荐:
func dataFilePath() -> String {
    let directory = documentsDirectory() as NSString
    return directory.stringByAppendingPathComponent("Checklists.plist")
}
not recommended 不推荐:
func dataFilePath() -> String {
    return "\(documentsDirectory())/Checklists.plist"
}
The built-in objects from iOS come with a lot of useful helper methods like these and it’s often better to use them instead of reinventing the wheel.
iOS 内置方式大量类似的极有帮助的方法,它们总会比我们重造轮子要好的多。
Still in ChecklistViewController.swift, add the following two print statements to the bottom of init?(coder), below the call to super.init():
required init?(coder aDecoder: NSCoder) {
    // ...
    super.init(coder: aDecoder)
    print("Documents folder is \(documentsDirectory())")
    print("Data file path is \(dataFilePath())")
}
SimPholders: https://simpholders.com
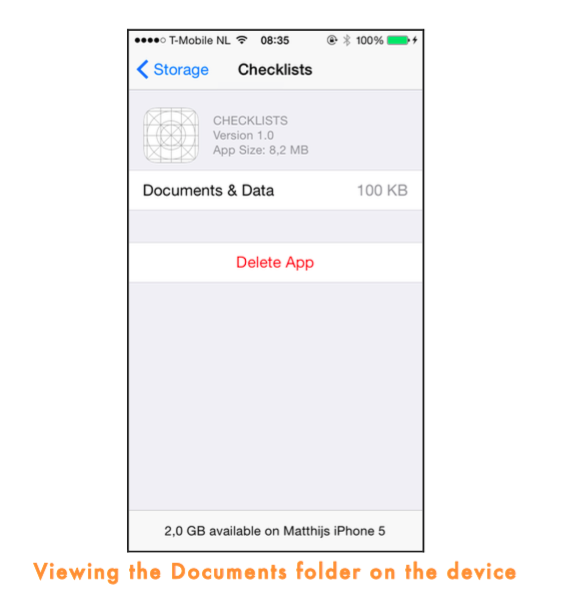
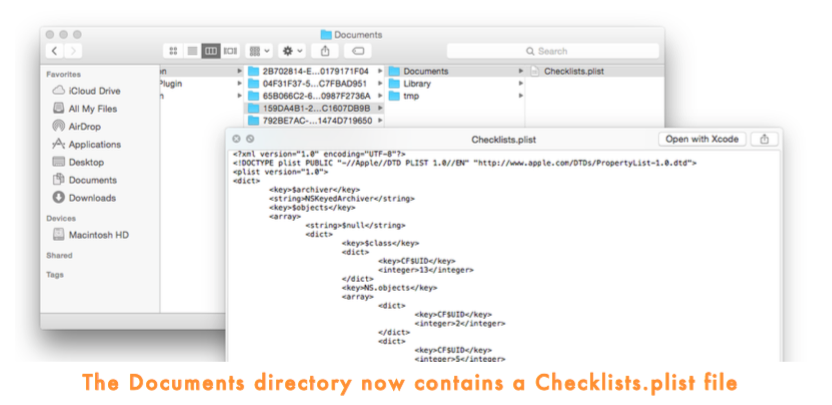
You can see several things inside the app’s directory:
- The Documents directory where the app will put its data files. Currently the Documents folder is still empty.
- The Library directory has cache files and preferences files. The contents of this directory are managed by the operating system.
- The tmp directory is for temporary files. Sometimes apps need to create files for temporary usage. You don’t want these to clutter up your Documents folder, so tmp is a good place to put them. iOS will clear out this folder from time to time.
On your iPhone or iPod, go to Settings → General → Usage. Under Storage (not iCloud) tap Manage Storage and then the name of an app.
Saving the checklist items
Add the following method to ChecklistViewController.swift:
func saveChecklistItems() {
    let data = NSMutableData()
    let archiver = NSKeyedArchiver(forWritingWithMutableData: data)
    archiver.encodeObject(items, forKey: "ChecklistItems")
    archiver.finishEncoding()
    data.writeToFile(dataFilePath(), atomically: true)
}- NSKeyedArchiver, which is a form of NSCoder that creates plist files, encodes the array and all the ChecklistItems in it into some sort of binary data format that can be written to a file.
- That data is placed in an NSMutableData object, which will write itself to the file specified by dataFilePath.
Add a call to saveChecklistItems() to the end of these methods inside ChecklistViewController.swift:
func itemDetailViewController(controller: ItemDetailViewController, didFinishAddingItem item: ChecklistItem) {
    // ...
    saveChecklistItems()
}

func itemDetailViewController(controller: ItemDetailViewController, didFinishEditingItem item: ChecklistItem) {
    // ...
    saveChecklistItems()
}
Let’s not forget the swipe-to-delete function:
override func tableView(tableView: UITableView, commitEditingStyle editingStyle: UITableViewCellEditingStyle, forRowAtIndexPath indexPath: NSIndexPath) {
    //...
    saveChecklistItems()
}
And toggling the checkmark on a row on or off:
override func tableView(tableView: UITableView, didSelectRowAtIndexPath indexPath: NSIndexPath) {
    // ...
    saveChecklistItems()
}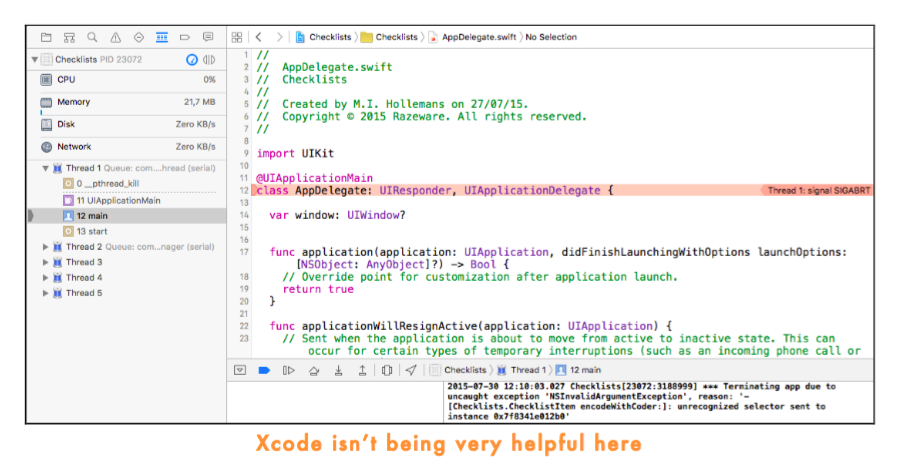
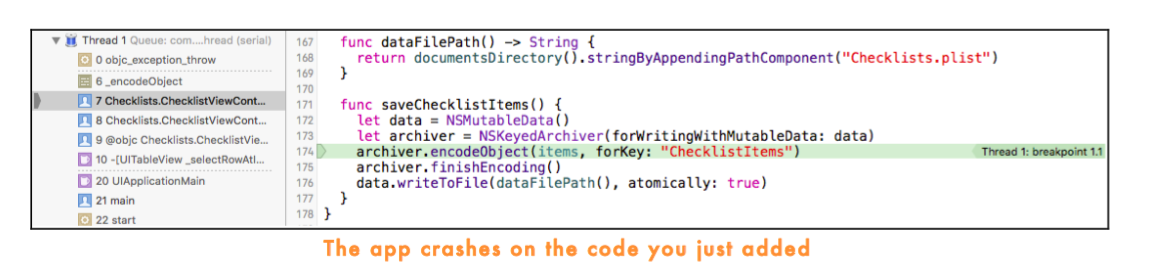
This line is the culprit: 定位到
archiver.encodeObject(items, forKey: "ChecklistItems")Change the class line in ChecklistItem.swift:
class ChecklistItem: NSObject, NSCoding {The methods from the NSCoding protocol are:
- func encodeWithCoder(aCoder: NSCoder)
- init?(coder aDecoder: NSCoder)
Add the following to ChecklistItem.swift:
func encodeWithCoder(aCoder: NSCoder) {
    aCoder.encodeObject(text, forKey: "Text")
    aCoder.encodeBool(checked, forKey: "Checked")
}
Add the second method to ChecklistItem.swift:
required init?(coder aDecoder: NSCoder) {
    super.init()
}
Also add this method to ChecklistItem.swift:
override init() {
    super.init()
}
It doesn’t do anything useful, but it keeps the compiler happy.
Loading the file
required init?(coder aDecoder: NSCoder) {
    text = aDecoder.decodeObjectForKey("Text") as! String
    checked = aDecoder.decodeBoolForKey("Checked")

    super.init()
}
A table view controller, like many objects, has more than one init method. There is:
- init?(coder) for view controllers that are automatically loaded from a storyboard
- init(nibName, bundle) for view controllers that you manually want to load from a nib (a nib is like a storyboard but only contains a single view controller)
- init(style) for table view controllers that you want to create without using a storyboard or nib
In ChecklistViewController.swift, replace init?(coder) with:
This follows the pattern for init methods:
required init?(coder aDecoder: NSCoder) {
    items = [ChecklistItem]()
    super.init(coder: aDecoder)
    loadChecklistItems()
}- First you make sure the instance variable items has a proper value (a new array).
- Then you call super’s version of init(). This time you call super.init(coder) to ensure the rest of the view controller is properly unfrozen from the storyboard.
- Finally, you can call other methods. Here you call a new method to do the real work of loading the plist file.
Also add the loadChecklistItems() method:
func loadChecklistItems() {
    // 1
    let path = dataFilePath()
    // 2
    if NSFileManager.defaultManager().fileExistsAtPath(path) {
        // 3
        if let data = NSData(contentsOfFile: path) {
            let unarchiver = NSKeyedUnarchiver(forReadingWithData: data)
            items = unarchiver.decodeObjectForKey("ChecklistItems") as! [ChecklistItem]
            unarchiver.finishDecoding()
        }
    }
}
Let’s go through this step-by-step:
- First you put the results of dataFilePath() in a temporary constant named path. You use the pathname more than once in this method so having it available in a local instead of calling dataFilePath() several times over is a small optimization.
- Then you check whether the file actually exists and decide what happens based on that. If there is no Checklists.plist then there are obviously no ChecklistItem objects to load. This is what happens when the app is started up for the very first time. In that case, you’ll skip the rest of this method.
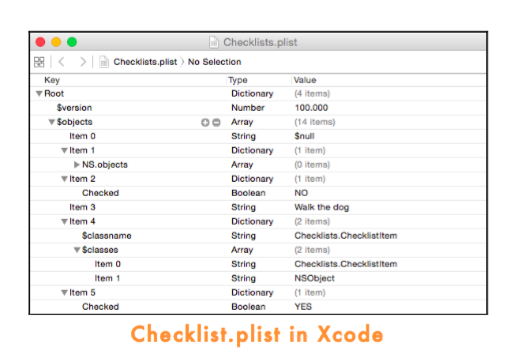
- When the app does find a Checklists.plist file, you’ll load the entire array and its contents from the file. This is essentially the reverse of saveChecklistItems().
Diff